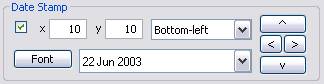
- Check the top-left box to enable/disable date stamp.
- Use [^], [v], [<], [>] buttons to move the date stamp up, down, left, right, respectively.
Tip: Press and hold the left mouse button on these buttons to continuously move the stamp. The longer the button is pressed, the faster the movement will be.
- Alternatively, type in the x, y coordinates directly to move the date stamp.
- The meaning of x, y coordinates are dependent on the method of alignment. Use the pull-down list next to the y coordinate to select the method of alignment.
Note: x and y are always positive. When the alignment is to the left/right, x is the horizontal distance from the left/right edge of the stamp string to the left/right edge of the photo. When the alignment is to the center, x is the horizontal distance from the center of the stamp string to the left edge of the photo. When the alignment is to the top/bottom, y is the vertical distances from the baseline of the stamp string to the top/bottom edge of the photo. The stamp string is left/center/right justified when the alignment method is to the left/center/right.
- Use the Font button to bring up the Font Control Dialog and change the font attributes.
- Use the format pull down list to select from a list of pre-defined date format, or select custom (the first entry of the list) to bring up the Custom Format Dialog and define your own date format.
Tip: For a photo that does not contain valid time code, you may use the custom format to create a time stamp of your own. Simply bring up the Dialog and type whatever string you want to stamp the photo.